
Search results for "bone"


$120.00
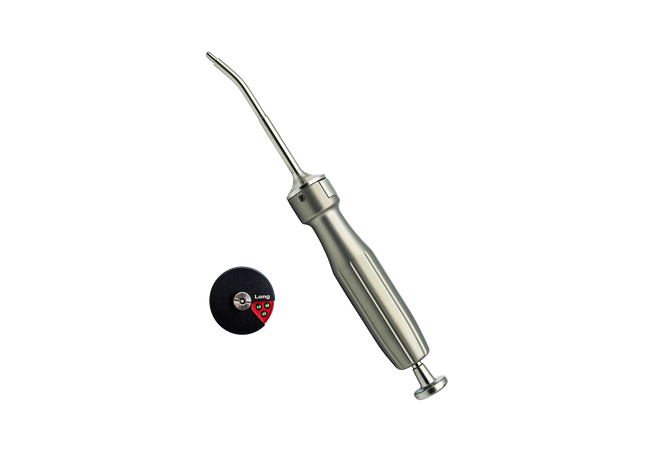

Automatic Bone Tac kit: TBM-05
Effectively secure membranes with the touch of a button with this Automatic Bone Tack kit. The unique handle drives titanium alloy tacks that stabilize the membrane. Kit includes: Automatic Tack handle with New Pull Back Mechanism Bone tack remover (BT-RM) Bone tack case with 21 tacs 21 Titanium Tacks (2.5mm D) - choose either 3.5mm short tacs or 4.5mm Long tacs. Additional tacs can be purchased separately here This Automatic Bone Tack holder is only compatible with MCT tacs Stabilize the membrane during the suturing process with the bone tac. Helps stabilize membranes from moving Reduce dental implant surgery time Screw type tac is recommended for Non-Resorbable membrane Tacs are made of titanium so they do not need to be removed Tacs can be purchased separately
$950.00


PRF-BOX (Fibrin Compressor - Platelet / Rich / Fibrin)
The Character of PRF Box Prevent infection by not using gauze Growth factor collected by PRF Box and used in bone grafting is helpful in the formation of new bone Direction of Use Draw 5cc blood from patients Extract PRF gel by centrifuging the blood sample Put the yellow part of PRF gel into the PRF Box and press by the weighted lid Use PRF membrane which has been separated from the liquid
$300.00$240.00


Titanium Mesh Membranes
Ti-matrix is placed after taking enough flap and then the bone grafting is performed afterwards, which ensures long-term stability in terms of flap healing. Ti-matrix ensures space maintenance for bone defect Ti-matrix is placed after taking enough flap and then the bone grafting is performed afterwards, which ensures long-term stability in terms of flap healing. Therefore, the right amounts of bone graft materials can be applied for primary closure as it was originally planned. Ti-matrix holds still even with one or two fixation screws. Ti-matrix can be used easily during surgery as it will enable surgeons to observe Made in Korea
$60.00 - $80.00


Curagen™ Collagen Wound Dressing Plug, 10x20mm (3/8" x 3/4"), 10 /box
Curagen™ is a porous and absorbent collagen wound dressing. It isesigned for use in tooth extraction sites and oral surgeries to stop bleeding and reduce post operative pain. Curagen™ wound dressing is made of non-crosslinked bovine Achilles tendon collagen and available in various sizes and configurations. Large collagen pore structure 4-week long resorption duration Lessen post-surgical pain & duration Higher bone mineralization density Ideal for Extraction sites, Oral surgery, Donor sites Heliplug Alternative
$90.00


GBR Kit -IV
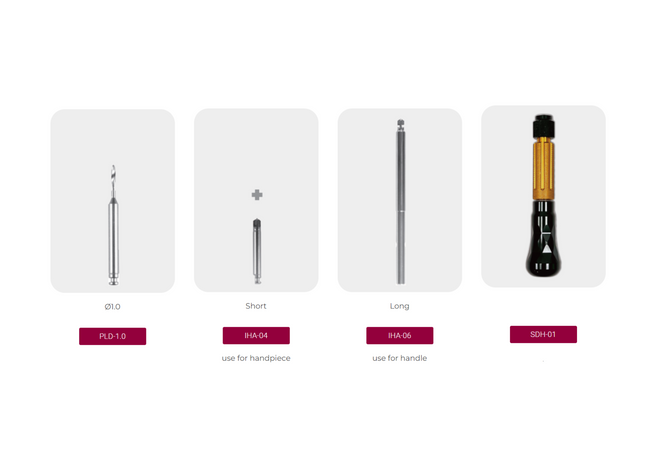
GBR KIT IV ( Screw 30EA, Bone Tac 12EA ) Screw holder for handle and handpiece Screw Driver Handle (SDH-01) Membrane fixation screw with membrane tac combo kit.
$1,000.00


GBR Kit Components
GBR Kit Components
$45.00 - $220.00


Fixture Removal Kit (FRK-01)
The Fixture Removal Kit contains the tools you need to remove a failed dental implant while minimizing trauma to the bone. Kit includes: 1 hand adapter 1 reverse torque remover wrench 7 trephines (for difficult combination cases) 3 implant removal drills, compatible with all popular implant systems - mini, regular, and wide platform Additional fixture removal drills can be purchased here. Instruction for use FRK: How it works Save surrounding bone and structuresUnique fixture remover screws and wrench help you remove implants with no compromise to surrounding bone, and no damage to neighboring structures. Designed to work with any threaded and self-tapping implant system3 different fixture screws to fit any threaded and self-tapping implant system. One reverse threaded driver remover for all implant sizes. Based on proven "counter clockwise" principleFixtures with rough surfaces can be explanted by applying a sufficient amount of force in a counter clockwise direction, which allows preservation of the surrounding bone, and makes implant removal a more predictable procedure. Simple Removal Technique Choose the correct Fixture Remover screw (FRS). Using the adapter, insert the FRS into the implant in a counter-clockwise direction. Once the FRS is seated the remover wrench is set in a “counter-clockwise” direction, apply a counter-clockwise force until the implant becomes mobile. Combination Technique: Use Reverse Torque Technique with included trephines for rare, hard-to-manage cases.Some patients experience pain under high reverse drive, and some implants will require these high torques for removal. In these extreme cases, to remove the implant without damaging the surrounding bone, trephines are used with the FR screws. However, do NOT use the trephines all the way to the end of the implant. Instead, use the trephines for 1/2 or 1/3 and then use the specialized fixture removers and reverse threaded driver to remove the rest of the implant.
$500.00$450.00
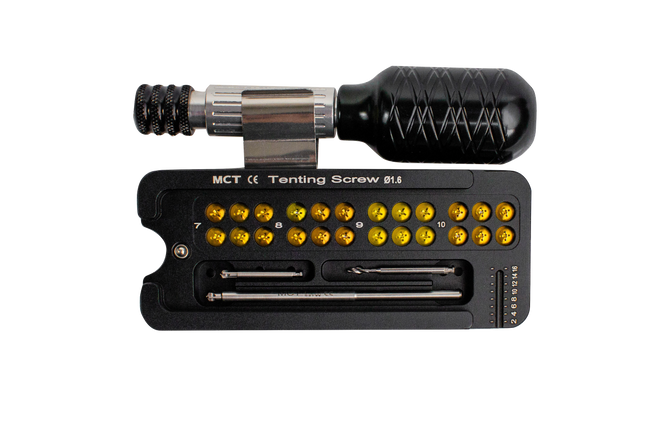
Tenting Screw Set
Kit includes: 1.4mm drill Screwdriver body 24 screws (6 x 7, 8, 9, 10mm) 2 driver shafts (one for hand piece) For individual tenting screws, click here. For all other tools, click here. Grafting of large vertical maxillary and mandibular alveolar ridge defects is difficult. The "tenting" technique involves the use of particulate allograft or block graft, in combination with specialized titanium screws, in a “tenting” fashion to augment large, localized, intraoral, vertical alveolar ridge defects for implant placement. Tenting with titanium screws maintains space and minimizes resorption of the graft. Easy to pick-up, stable to transfer, and quick engagement to bone this kit is suited for particulate or block grafting and has a specialized design that provides significant advantages over traditional screws for either purpose. The 5.0mm broader head protects and stabilizes the graft making it tissue friendly. The 4mm thread depth allows for decreased risk to the nerve and tooth roots while allowing for augmentation neck heights of 3, 4, 5, and 7mm. Grabbing screws with the kit (video)
$980.00
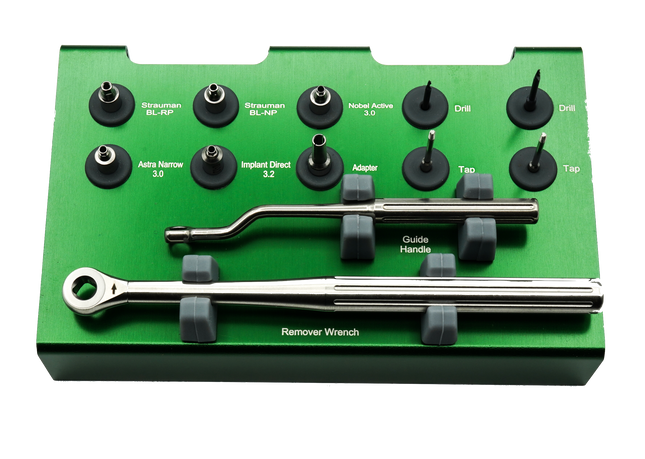

Screw Removal Kit for NARROW platform implants (NGRK-01)
Safely remove damaged/stripped dental implant connection abutment screw. Rescue kit for all dental implant specialist. The only you kit you need to remove a fractured or broken screw and save the implant. Based on the proven counter-torque and reverse screw technique. Fractured Screw Removal Kit Components Reverse Threaded Screw Removal Tool The kit utilizes specialized screw removal drills to prepare a channel in the long axis of the screw. Then a self-tapping, reverse threaded screw removal tool is inserted and turned slowly to provide an engaging instrument which grabs hold of the fractured screw and unscrews it. Certain Guides: Protect Implant Body and Position Drill in Center The system also includes a series of certain guides which protect the internal aspect of the implant body from the damaging effects of drills touching the threaded internal surface. The guide abutment system also allows the initial drill and the reverse tip to be positioned in the center of the broken screw. Procedure: Pick guide for abutment Attach guide and hold it with holder Use screw remover drill to take hold of the core of the broken screw in a reverse manner (1200 rpm) Use tap to remove the broken screw in a reverse manner (30 rpm) Kit includes: 2 Tap (SRT-03) 2 drills (SRD-02) Adaptor (SRA-01) 1 guide handle (SRG-H) 1 remover wrench (FRW-01) 5 guides for Narrow implant systems Strauman Bone Level (BL) Regular Platform (RP) Strauman Bone Level (BL) Narrow Platform (NP) Nobel Active 3.0 platform Astra 3.0 narrow platform Implant Direct 3.2 More Guides and Replacement Components Instruction for Use including screw guide compatibility chart
$500.00$450.00


Hydraulic Sinus Master
Kit Includes: 6 Crestal Drills: Ø2.0, Ø2.5, Ø2.8, Ø3.3, Ø3.8, Ø4.2 8 Drill Stops: 1-8mm 4 Hydraulic Crestal Reamers: Ø2.8, Ø3.3, Ø3.8, Ø4.2 2 Lateral Drills (1mm, 2mm) and 2 lateral Reamer drills (2mm, 3mm) 1 Bone Carrier 5 Lateral Sinus Instruments (inc. 1 Sinus Depth Gauge/Packer)
$1,000.00$900.00


Ora-Aid: Oral Bandage
15X25mm, 20pc/box Scroll down to watch instructional video Ora-Aid is a new concept pasting intra-oral patch to protect the affected area such as post implant, extraction, orthodontic, and ulcers. It is easy to use, just peel off and stick on the site! You can improve the predictability and success rate of intra oral surgery by good sealing and extra protection How to Use 1. Irrigate the wound with sterile or saline solution 2. Cut Ora-Aid into a proper shape and size. It should be trimmed according to the length of surgical site. (watch our videos for a demonstration of a cutting technique) 3. Slightly remove moisture, and excess saliva with gauze on the wound. Excessive moisture or exudation may reduce the adhesive strength and attachment time of Ora-Aid. 4. Remove transparent release paper and apply Ora-Aid on the wound. 5. Gently press Ora-Aid for 5 to 10 seconds while Ora-Aid adheres to wound. Click here for e-Catalog Research article Effects of a Topically Applied Oral Wound Dressing Film on Intra-oral Wound Healing in Rabbits Watch More Video (Click link below) Immediate implant placement after GBR Non-incision implantation after GBR Clinical Cases Suture Protocol1 How to attach Ora-Aid properly Socket Grafting Fixture removal and Bone Grafting Lateral Sinus Lift with implant placement One Stage Implant placement Clinical case Dr. Baranes 1 Clinical case Dr. Baranes 2
$92.00


